Washed in the Word Part 6 – How to Survey a Book of the Bible

The first goal of the Washed in the Word R.INS.E study method is to Read the book of the bible you are studying chapter by chapter trying to grasp the big picture so that you have a high-level idea of the topics of each chapter. This forms the context that you need to have before you can read any passage in that book of the Bible more deeply. In the survey worksheet the heading of the first page for each book has a form for recording the book name, genre, author, audience, date and location of writing. This is followed by a block section where after reading the book you record its theme and purpose and any other notes or thoughts.

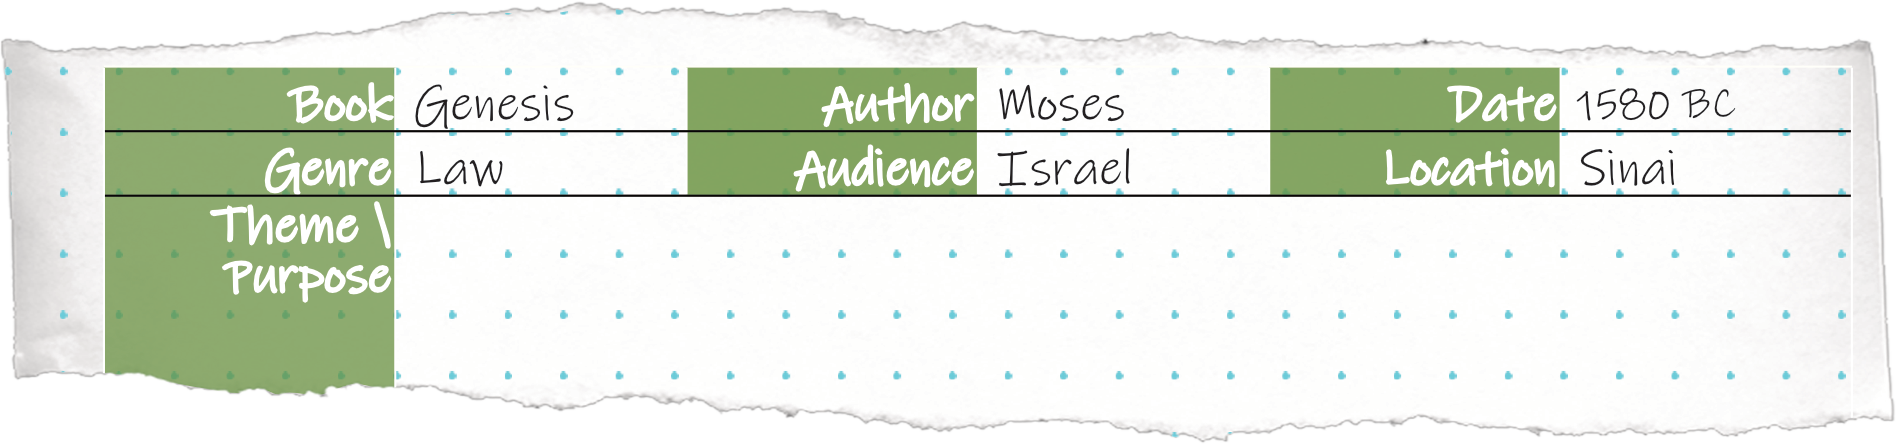
Some of this basic information you may be able to find in each book as you read it otherwise a good study bible or commentary will have this information. To make it easier, at the end of this section there will be two tables, one for the Old Testament and one for the New with this information.

Surveying the Text

Identify

To do a survey you will be concentrating on the setting and keywords which you will mark in brown and God marked in purple. Start by looking for and circling repeated words and their synonyms.  If they match one of the categories depicted in the earlier section, then circle them in that categories color. Why do you start by looking for repeated words? With anything written the author has some ideas or points he wants to communicate to the reader. The terms that describe these points will be repeated as they are exponded upon or will be stressed using repetition. Therefore to grasp the major topics one needs to look for repeated terms and these form the basis for the context of what is written.

As you identify key repeated words make note of the genre if it differs from the book’s general genre. Books of law may also have history and poetry. Identify people, places and things that make up the setting and key events or commands and mark these following the symbols guide below. These might be obvious, but they might not stand out. At this point you can start using inquiry or some simple questions to help identify elements of the setting and circumstances. 

Inquire

In English classes you should have run into the five Ws and a H. While surveying and later when you inspect the text you will need to start asking who, what, when, where, why, and how. While surveying the level of questioning doesn’t need to be as probing as when you are rereading the text during the Inspection phase and you will limit yourself to specific questions focusing on the setting and keywords to just gain a basic understanding of the topic that is being addressed in the chapter. 

Start by asking who are the main characters or groups of characters and are they a protagonist or antagonist? What does God do or what does He command or promise? Marking what he does with a purple double underline and God’s promises with a purple arch and His commands with a green exclamation point and underline. What are the main events? Mark antagonists and protagonists with a brown underline ending in an A or P respectively. If it is a king or kingdom draw a blue crown at the beginning. Mark references to God with a purple triangle or angel of the Lord with a red cross. But only mark these when God is actively at work or responding. If the chapter is just talking about God such as saying “we have sinned against God” then these references do not need to be marked. You only want to call attention to God, Jesus or the Holy Spirit when they are an active character in the chapter so you can see when God is responding. The goal here and and more so during the Inspection phase is to grasp what His feelings are about the circumstances recorded.

Then ask where is this happening or where is the author seeing what he is writing? When is this happening? Underline and mark the location with a blue at sign @ and times with a blue circle with clock hands (/). If the author is writing from a particular vantage point rather than use an at sign start with a semi-encircled v into an (V underline. For example when Moses is describing the creation of the world in Genesis 1 where is he? He is with “(V the Spirit hovering over the waters“. 

The vantage point and use of phenomenal language can be key to understanding what the bible is saying. Phenomenal language is the use of words to describe what you see or feel happening from the perspective of your senses and from your vantage point. We use this every day when we say “the sun rose” or “the sun set”. The sun doesn’t really go up or rise nor does it go down or set. When Moses describes the sky as a firmament he isn’t saying it is a solid dome, he is saying it looks like a dome. If you accept that it must be a dome then you run into the problem of a clash with reality that is not necessary at all. While the bible is not a science text book it does describe things that actually happened and that exist. Whatever may be described more precisely or scientifically should be able to match what the author describes if he were to experience it, the bible does not make mistakes. 

Digest / Summarize

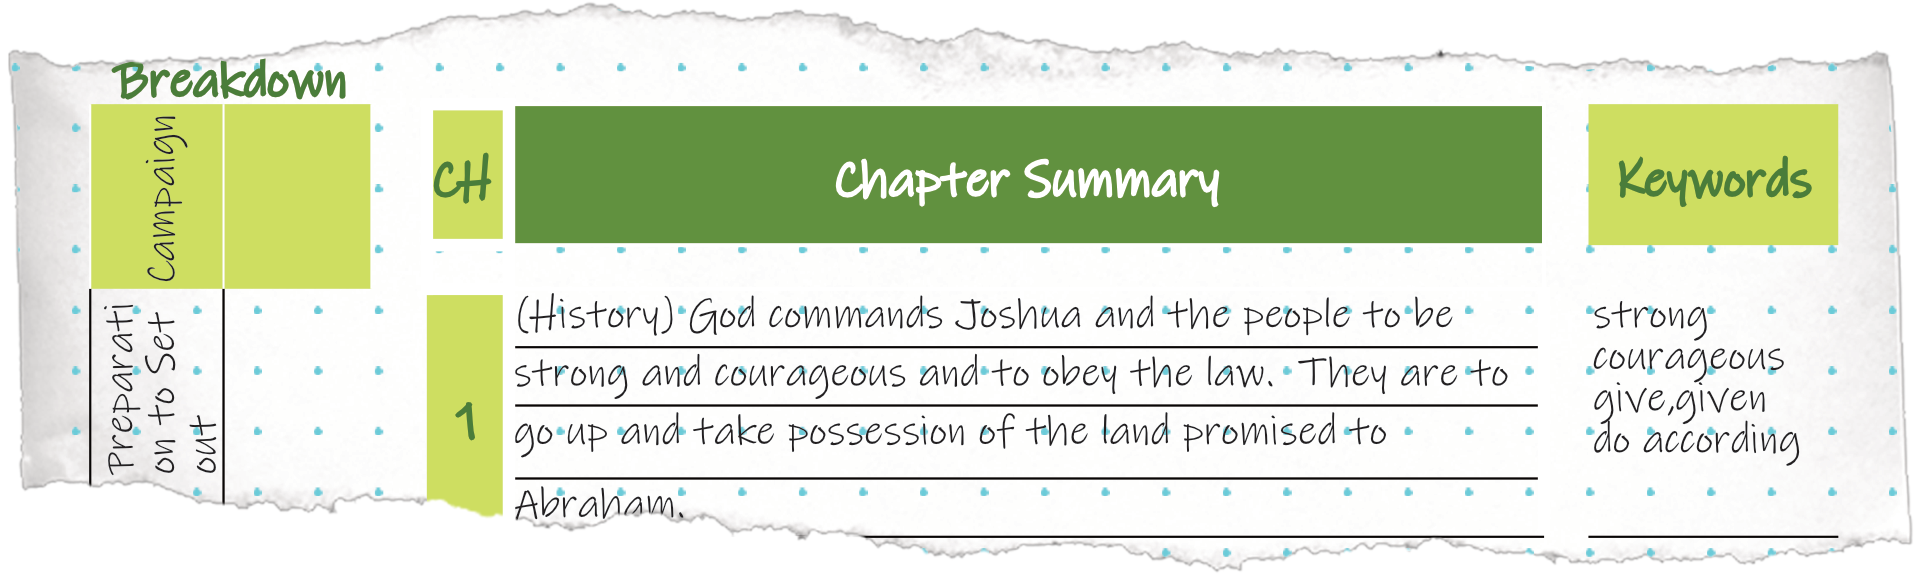
Since this is a survey you don’t want to spend much time asking how and why. If an explanation of how or why is apparent take note of it but we will spend time on this during the inspection phase. After you have read the chapter and marked the obvious keywords and setting record the keywords in the keyword’s column in the survey form and in the margin of your bible. Then write a short one or two sentence summary in the middle summary section of the form. If the genre is different from that of the book record that in parenthesis. 

These summaries and the worksheets will become a reference in the future as you inspect and re-examine a passage in the Bible. It will form the context that limits or qualifies what may be understood. Finally, they will help you better remember what you have read and will develop Biblical Intelligence.

“Perhaps the best test of a man’s intelligence is the capacity for making a summary.” – Lyton Stachey
Then the best exercise to develop biblical intelligence is to practice making summaries.

Roll Up into a Breakdown

In the Bible survey worksheet you have been recording the keywords and summaries. Now it’s time to pull it all together. Consider the keywords column from each chapter and the categories they might fall into. Can you group the keywords in any way? Use the breakdown columns to group the chapters and their keywords into categories. You are rolling up the chapters’ settings and key words into main points of an outline which becomes the breakdown of the book. 

You are looking for relationships between chapters and you will need to do this as part of an end of book review but if you notice a change or turning point or transition while reading don’t hesitate to make note of it using a pencil in the breakdown column so you don’t forget it. To use the breakdown columns you will want to turn the page horizontal and draw lines between these changes you see in categories and then write a short title for that break or segment. Some categories or ways of grouping keywords and circumstances of the setting include:

  • Composition or Literary Devices
    • Pivotal Points / Turning Points
    • Progression and Climax
    • Radiation
  • Others
    • Time / Place / Vantage Point
    • Reigns
    • Topics
    • Doctrines
    • Events / Tasks
    • Signs
    • Goals / Objectives

Finally, in the heading block of the worksheet write a theme and purpose for the entire book. The theme can be thought of as if someone were to ask you “write me a title for that book”. Next write down why you think the book was written and any other notes you feel may be helpful. Now you have completed your survey of the book. You will want to keep these surveys for future reference whenever you come back to study a passage in that particular book of the Bible.

Old Testament Books – Author, Date, Location and Genre

New Testament Books – Author, Date, Location and Genre

Washed in the Word Part 5 – Method Overview

The Washed in the Word method of Bible Study is made up of three phases or degrees of study called R.INS.E, followed by Reflection and Response.  During each phase you will use methods of observation and interrogation of the Bible passages you are studying to progress to ever deeper levels of understanding. The R.INS.E acronym stands for Read, Inspect and Examine.

R.INS.E – Reflect – Respond Method of Bible Study Diagram

First you Read a book of the Bible chapter by chapter with the goal of grasping the big picture. This big picture should be captured in survey journal worksheets with lists of keywords and summaries for each chapter that then become the context for the next phase of study, Inspection. While you are reading and during inspection you will use colored pens to mark keywords, circumstances and God’s responses through which He reveals Himself to His people. The colors you use for marking should use consistent categories and symbols. The category color guide below is a suggestion of colors and their categories for your consideration. You can use these or come up with your own, or just start with these and then when you get a new journaling Bible you can always consider coming up with your own categories.

During inspection you ask deeper questions and look for other concepts and connecting words that show the relationships between statements. The questions you have and answers you find should be recorded in a journal called a Miscellanies (invented by Johnathan Edwards). A Miscellanies journal is designated with a letter code and then each entry with that code and a four digit sequence number and the bible reference being studied. The code and sequence number are then written in the bible margin of the passage being studied. This method allows you to write much more about a passage than you would be able to in the margins of any Bible.  A dotted journal even allows you to draw diagrams and pictures to help visualize what a passage is saying. 

The third phase or degree is Examination where you use concordances to look for what else the bible has to say on the topics and keywords realted to the passage you have inspected. After Inspection you should have used methods of interpretation and reached a level of understanding of the passage. During Examination you write down what you understand and compare it to the other similar passages found in cross reference resources using the cross reference worksheets to evaluate your understanding. 

After both Inspection and Examination you should spend time reflecting upon what you have observed and understood from the passage. Based on what your have understood and reflection on your own life you may find verses you should memorise or things you should do. You will capture the Bible verses to memorize and the things you need to do in verse and task kanbans. These give you a set of things to work on that will become your response to what God’s spirit has revealed in scripture that you should do.

23 Because if anyone is a hearer of the word and not a doer, he is like someone looking at his own face in a mirror. 24 For he looks at himself, goes away, and immediately forgets what kind of person he was. 25 But the one who looks intently into the perfect law of freedom and perseveres in it, and is not a forgetful hearer but a doer who works—this person will be blessed in what he does.

James 1:23-25

Washed in the Word Part 4 – Bible Study Tools

Now that you have set out to study God’s word there are some things you will need and some things you may want to consider adding to your tools for studying the Bible. The first and most obvious would be a Bible. But which Bible is the best choice? As mentioned previously there are many translations. The Bible was written in Hebrew and Greek. What you may not know is that not only are the words different in another language but the order of words may also be different. For example, not only is Hebrew written from right to left but while English sentences have the order subject-verb-object, SVO, in Hebrew the word order in a sentence is subject-object-verb, SOV, and it only switches to subject-verb-object in Hebrew poetry. Further adjectives and adverbs do not precede the noun or verb as in English but come after them. Other differences would be idioms or sayings. In Hebrew they would say “it doesn’t touch me” but in English we would say “It doesn’t ring a bell”. So, when a translator sits down to translate the Bible from its original language, they have a lot to consider communicating the intended meaning. 

Choosing a Good Translation

There are three methods translators use: formal equivalence, dynamic equivalence or paraphrase.

  • Formal equivalent translations have the goal of capturing the broadest meaning of the original language and try to use a single word in English whose possible meanings are as close to that of each word in the original language and then adjust the word order for English and where necessary reword sayings so that we can understand them. The words chosen will often be more academic or formal English words since the goal is the broadest sense of meaning. 
  • The dynamic equivalent focuses more on the meaning and spirit of the original text, rather than rigidly adhering to its structure and form. There are two types of dynamic equivalents. 
    • The Functional equivalent will approach each phrase constructing a phrase in English choose the best word or words leaning more toward the formal equivalent where possible. 
    • The Natural equivalent will look at the phrases that make up a single thought and craft a phrase to communicate the intended meaning using common language or the simplest wording possible. 
  • A paraphrase will take each sentence and write it in English with as many words and descriptions as the translator feels are necessary to communicate what they think the author was saying. 
LSB/NASB/NKJVGNTNLT
I will make you fishers of men.I will teach you to catch people.I will show you how to fish for people!
Matthew 4:19

What are the issues with these methods? A good example is Matthew 4:19 in the preceding table. The NLT translates “make” as “show you how” and this is easy to understand but it doesn’t capture the full meaning of the original language where as “teach” in the GNT includes “show you how” but also involves explanation and opportunities for practice and captures a broader meaning closer to the original. The word “make” however includes all these meanings but also captures the fact that God is in charge and actively working in the lives of the disciples. The simpler translation is missing a lot of meaning. All translations require the translator to understand to varying degrees what the original author was trying to say, which is interpretation. However, you must ask the question; at what point am I just listening to what someone thinks the Bible is saying instead of trying to understand what it is saying for myself? 

This is God’s word to us, and we should want to know what He is really saying. You should always start with reading the bible to get a basic idea of topics and a paraphrase or dynamic equivalent may be good enough but to really study the bible you will need a Natural or Formal Equivalent. The quadrant chart shows bible translations by their reading level and how close they are to the original meaning. The upper right quadrant are translations that have balance between being easy to read and being as close as possible to the original language.

Choosing a Good Bible Format

Once you choose a translation the Bible comes in many formats including digital online bibles as well as journaling, study, reference, and compact printed bibles. The Logos, Olive Tree and Blue Letter digital bibles have many resources and the ability to take notes, and highlight. Blue Letter ScriptureMark and Logos have some marking ability, but most digital bibles do not have the ability to draw lines and symbols. Print Bibles will either have two columns or a single column. Study bibles will have introductions, outlines, references to other similar bible verses either in between columns or in the gutter and commentaries at the bottom of each page. Study bibles have many tools that are useful to help understand the bible however most have so much information that the margins are too narrow to take notes. To study the bible and take notes one of the best formats is a single column bible with the references in the gutter and wide outside margins for notes such as the NKJV wide-margin reference bible, ESV/NASB Inductive Study Bible or Baker Illustrated CSB Study Bible.

Study BibleJournaling Reference Bible

Bible Marking and Journals

After selecting a bible to start journaling you will need to consider highlighters and marking pens. You will want to decide on a color code so that what you emphasize uses a color with a meaning behind it. Highlighters draw attention to verses that stand out or are significant in a chapter. The problem is many highlighters bleed through thin paper. The gel highlighters meant to solve this problem are more like crayons and do not bleed but leave a waxy film which prevents using pens for marking later and when they warm up in a car the pages tend to stick together. The best highlighters I have found are the Zebra Midliners.  

Still highlighters are limited to drawing attention to a verse. Using fine-liner or gel pens you can focus on individual words or phrases by circling, boxing, underlining, or even drawing symbols and lines may be drawn between these symbols to show relationships. Bible marking helps to show repeated words and to see relationships visually between words and phrases. I have found the best marking pens to be Charsoco or Micron MicroLine pens, followed by the Uni Style fit and the Zebra Sarasa Clip gel pens. The Uni Style fit and Zebra Clip pens also have customizable multi-pen options great for travel. 

While you can journal in your bible even the wide margin journaling bibles are limited with space. You can get A5 or Letter size binders to use custom forms like those in the resource section of this blog. The Survey forms are a good place to start and we will discuss these in upcoming articles. A page numbered dotted grid journal may be used to write further notes and even draw pictures. You can use a code for the journal such as M followed by numbers, 0001, which you write in your bible and then write at the top of the journal page and reference in a table of contents in the journal. With this method you can even journal using a bible with small margins and add multiple notes from multiple journals with different codes as you read God’s word over time. I suggested the first journal as M because this method was invented by Jonathan Edwards and he called it the Miscellanies journal method of bible study. In the next articles we will go over how to use these journals. Additionally you may want to add on some page marker tabs so you can mark questions you’ve recorded in your journal for which you may not know the answer but as you read on in the bible the answer may become apparent. If they are marked then you can come back to them.

Bible References – Commentaries, Concordances, & Dictionaries

Finally, there are many reference tools available that can help you on your journey. Many pastors and scholars have studied the bible and written down notes and their own thoughts about bible passages and these have been published in Commentaries. Many are available online in the Blue Letter Bible, and Bible Hub or you can buy copies in print. Some examples are the Moody Bible Commentary, Jamieson, Fausset & Brown, Matthew Henry, John MacArthur, the Archaeology Study Bible and Dr. J. Vernon McGee. These tools are good to check your understanding of a bible passage and to learn about the culture and people to whom the bible was written. 

Concordances such as the Open Bible Cross References, Treasury of Scripture Knowledge, Thomson’s Chain References and Strongs have lists of references, key words found in the bible or topics and give references to other similar verses in the Bible. This can help you find other passages in the bible that talk about the same topic and would be used to examine scripture with a cross reference study. Word study dictionaries such as Mounces or Vines allow you to look up an English word used in the Bible or if you have a word study bible with Strongs numbers you can look up the original Greek or Hebrew word using a code number and get its definitions and examples of how it used. These are good tools for doing word studies that can be found online at Blue Letter Lexical Resources or may be purchased in print format.